 Gridwright
Start for $1
How to Make Autotiles in Godot 4 (47 Tiles, No Seams)
Make a 47-tile autotile terrain for Godot 4 from one small template: the tiles, the terrain peering bits and the seam check, step by step, in your browser.
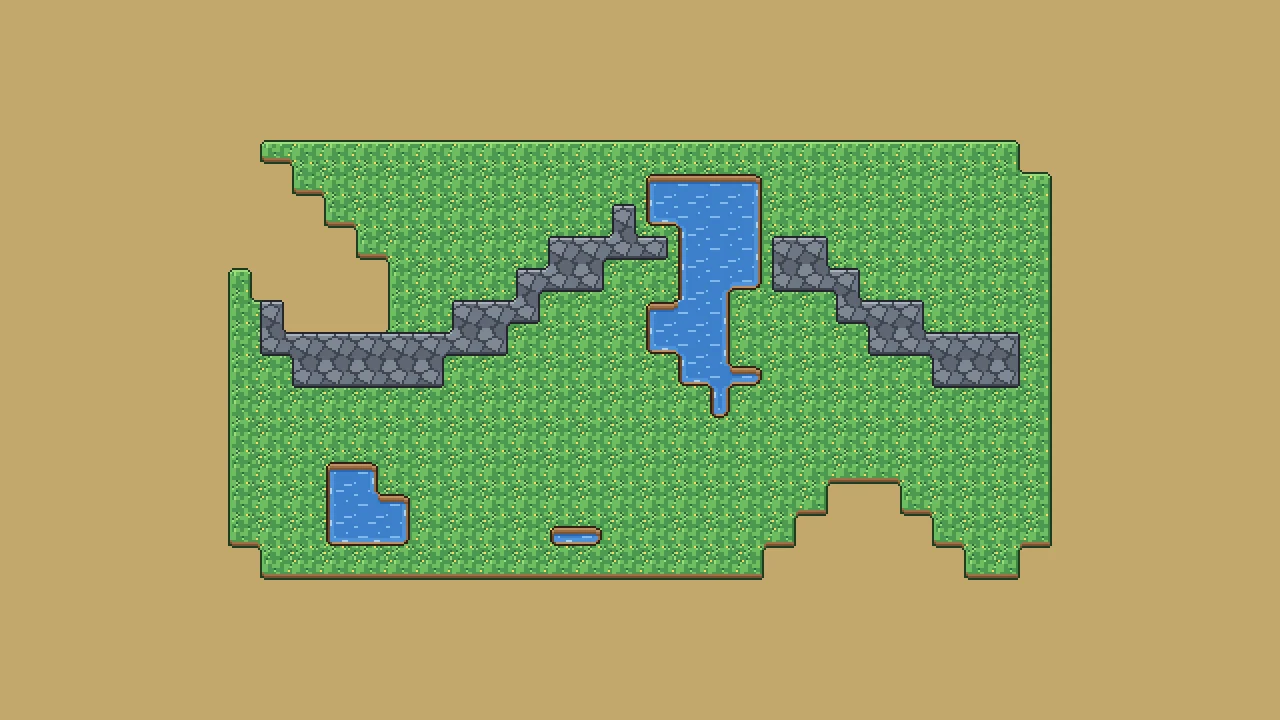
You draw one nice grass tile, then a dirt path, and then Godot asks for the edges. All of them. A terrain that joins neatly on every side, with inner corners, outer corners and thin strips, needs 47 different tiles. Then each of those 47 needs its terrain peering bits clicked in by hand before Godot 4 will paint with it. That is an evening gone before you place a single level.
This guide shows the fast way: draw one small template, let the Autotile Builder make the 47 tiles and check them for seams, then paint terrains in Godot 4 with a TileMapLayer. You can try it here while you read: the free demo runs on the tool's page, with no account.
Why autotiles in Godot 4 take so long
Godot 4 has terrains built in. You give the TileSet a terrain set, tell it how tiles match their neighbours, and mark on every tile which of its sides and corners belong to which terrain. Those marks are the peering bits. With them in place you paint grass, and Godot picks the right edge tile on its own.
The catch is the count. A terrain set in Match Corners and Sides mode looks at all 8 neighbours of a cell. To cover every case you need the full blob set of 47 tiles. Each one has up to 8 peering bits to set, so a single terrain means hundreds of clicks in the TileSet editor, and one wrong bit gives you a seam that shows up three levels later.
There are two smaller modes. Match Sides looks at 4 neighbours and needs 16 tiles. Match Corners looks at the 4 corners and needs 16 too. They are quicker to fill but give blockier shapes. For natural ground like grass, sand, water and cliffs, the 47-tile blob set is what makes a map look hand-drawn.
Step 1: Draw a small template
You do not draw 47 tiles. You draw the pieces they are made of. A plain 3x3 island is enough: a block of your terrain with its outer edge and corners drawn, sitting on transparent pixels or on the ground underneath. A compact 2x3 template, 3 tiles tall, works too if you already have inner corners drawn.
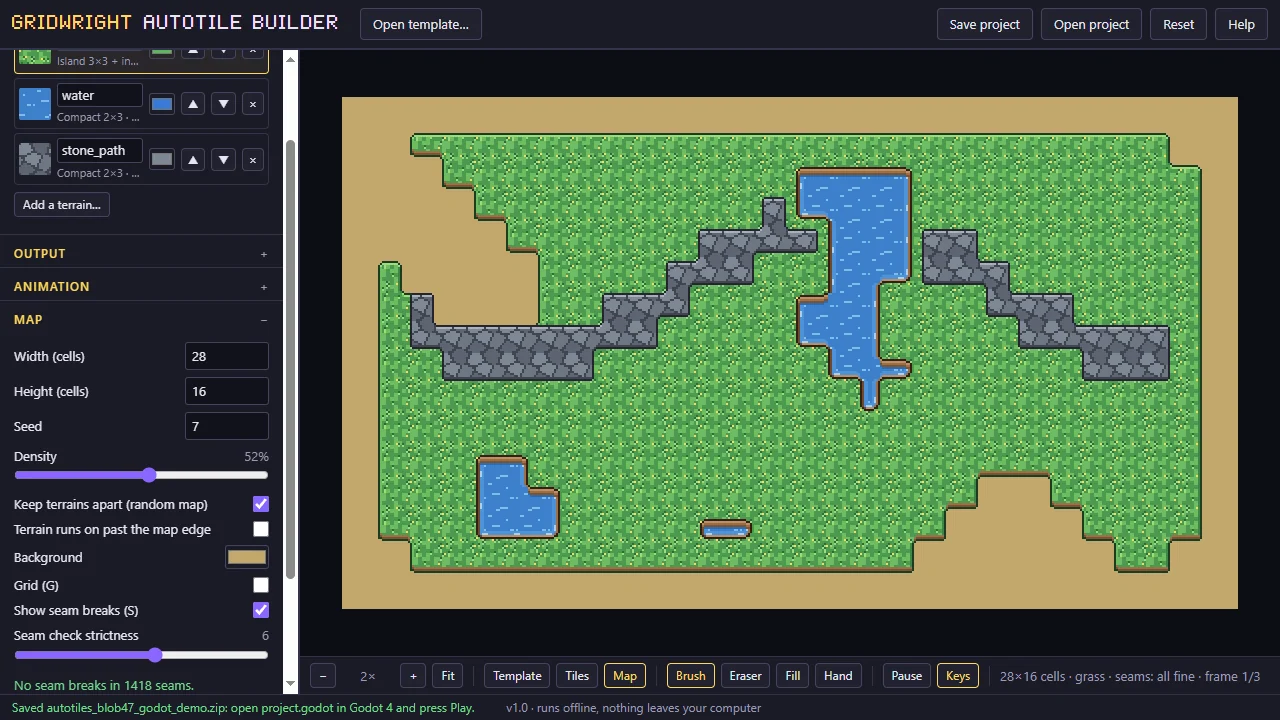
Keep the tile size you use in the game. The Autotile Builder takes tiles from 8 to 128 px, and our own packs use 16x16.
Tips for a template that builds cleanly:
- Keep the edge band the same thickness on all four sides.
- Draw the inner area as a texture that repeats. Avoid one big feature in the middle, because it will repeat across the whole field.
- Use the palette of the rest of your game, so the new terrain sits with your other tiles.
Step 2: Build the 47 tiles and check the seams
Open the template in the Autotile Builder, or press Try the sample to see it on ours first. It builds every combination of neighbours from the pieces of your template, so you get the full blob set: 47 tiles. The same template also gives the 16-tile sides and corners sets.
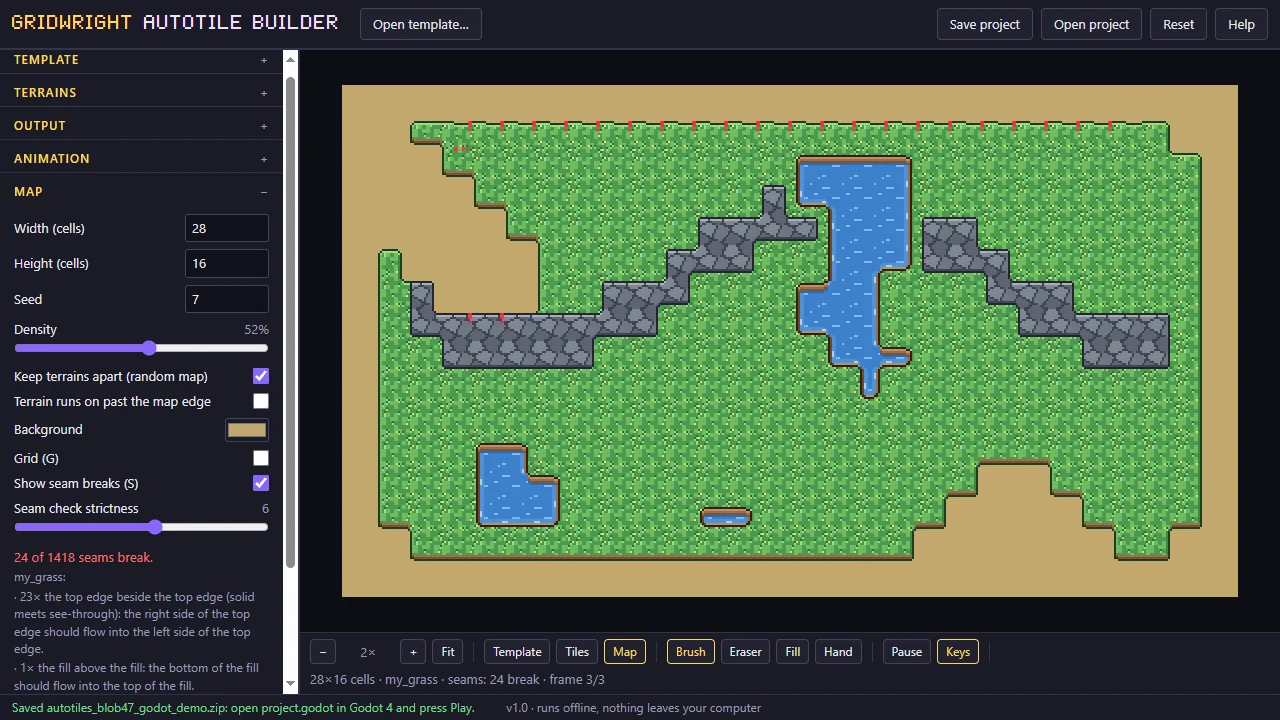
Then comes the part that saves the most time: the seam check. It paints a random map from your new tiles and looks at every place where two tiles meet. When an edge does not line up, it names the piece of the template to fix. You fix one tile in your template, not the same mistake in twelve finished tiles.
If the terrain moves, like water or lava, add 2 or 3 frames. Every tile gets the same frames, so the whole field animates together.
Every Gridwright asset pack, made to fit together, and all 31 tools for the fiddly work, with every new release, for $17 a month. Try it in your own game first: 3 days for $1, cancel any time.
Start for $1Step 3: Get it into Godot 4
What you save decides how much work is left in Godot.
The free demo saves the Blob 47 atlas for one terrain as a PNG with a JSON map of where each tile sits. That is the tiles. In Godot you then make the terrain set yourself:
- Create a TileMapLayer node and give it a new TileSet with your tile size.
- Drag the PNG into the TileSet's atlas, and let Godot cut it into tiles.
- In the TileSet inspector, add a Terrain Set with the mode Match Corners and Sides, and add a terrain to it with a name and a colour.
- In the TileSet editor, open Paint, choose Terrains, and paint the peering bits on all 47 tiles, using the JSON as your guide to which tile is which.
With Gridwright, the Autotile Builder writes the Godot 4 TileSet (.tres) for you, with the terrain set, the terrains and every peering bit already set, plus a small demo project. You open it, put the TileSet on a TileMapLayer, and start painting. Several terrains go into one atlas and one TileSet, so grass, dirt and water are all ready in the same file. It also saves a Tiled tileset with a wang set and RPG Maker A1 and A2 sheets, if you build in those too.
Step 4: Paint terrains on a TileMapLayer
With the TileMapLayer selected, open the TileMap panel at the bottom of the editor and go to the Terrains tab. Pick the terrain set and the terrain you want, then paint:
- Connect mode draws freely, and Godot updates the neighbours so every edge stays joined.
- Path mode draws a line of terrain from one cell to the next, good for roads and rivers.
- The rectangle and bucket tools fill an area in one go.
Erase with the right mouse button, and Godot fixes the edges around the hole. If you ever see a tile that does not belong, it is almost always a peering bit set wrong on that tile. With a TileSet written by the Autotile Builder, the bits come from the same template the tiles do, so they agree.
Common problems and their fixes
A thin gap between tiles when the camera moves. This is texture bleeding, not a bad tile. Turn on pixel snapping in the project settings, use nearest filtering for pixel art, and give the atlas a pixel of edge extrusion. With Gridwright, the Autotile Builder adds gaps and edge extrusion to the atlas when you save it.
Godot picks the wrong tile in tight corners. Your terrain set is in Match Sides mode with a 47-tile set, or in Match Corners and Sides mode with only 16 tiles. The mode and the tile count have to match.
The middle of a big field looks like wallpaper. Your template's inner area has one feature that repeats. Draw two or three variants of the full tile, or keep the inner texture quieter.
Two terrains fight where they meet. Put both terrains in the same terrain set, and paint the one that sits underneath first.
Try it on your own terrain
The fastest way to see whether this fits your game is to open the Autotile Builder demo and press Try the sample. You will see the template, the 47 tiles and the seam check on a random map in about a minute. When you want the Godot TileSet, more terrains in one file and animated water, start Gridwright for 3 days for $1. You get all 32 tools, the Autotile Builder among them, and 132 asset packs that already use the same 16 px grid.
Every Gridwright asset pack, made to fit together, and all 31 tools for the fiddly work, with every new release, for $17 a month. Try it in your own game first: 3 days for $1, cancel any time.
Start for $1